NEET UG 2026 Aadhaar Photo Mismatch Problem: How to Fix eKYC Verification Step-by-Step, Verification Certificate Download
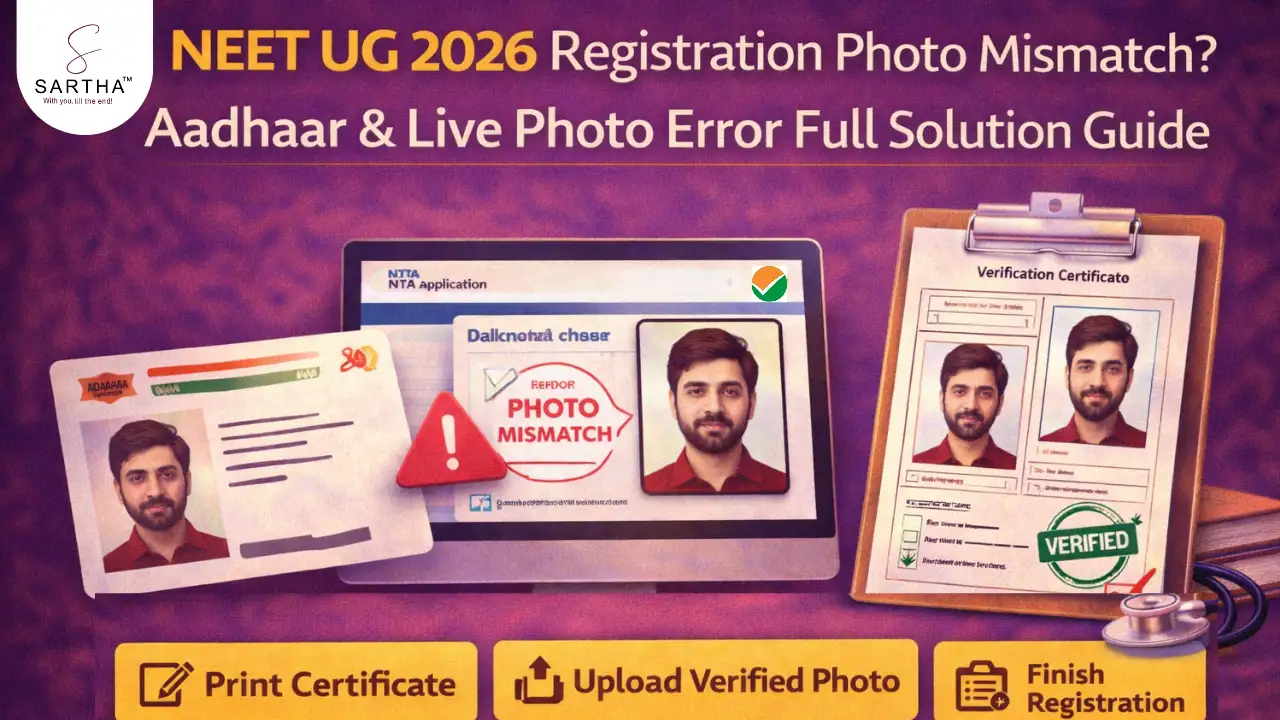
NEET UG 2026 Registration: Aadhaar & Live Photo Mismatch Problem
The National Testing Agency (NTA) has started the NEET UG 2026 registration process on the official website neet.nta.nic.in. Along with the new application form, NTA has introduced strict identity verification using Aadhaar-based eKYC and live photo capture.
Many candidates are now facing a common issue — the system shows a “Live Photo and Aadhaar Photo Mismatch” error during registration. Because of this error, the application form stops at the verification stage and candidates cannot proceed to complete the form or pay the fee.
This guide explains why this problem occurs and how you can fix it step-by-step so that your NEET UG 2026 application is not rejected.
Why NTA Introduced Aadhaar eKYC & Live Photo Verification
NEET UG is one of India’s largest entrance exams with more than 20 lakh candidates every year. To prevent impersonation and unfair means, NTA has added digital identity verification.
- 1. Enter Aadhaar details for authentication
- 2. OTP verification
- 3. Live photograph capture
- 4. Automatic comparison with Aadhaar database
If both photos match, registration continues normally. If the system detects a difference, the application stops and a mismatch warning appears.
Why Aadhaar Photo Mismatch Happens
- 1. Old Aadhaar photograph
- 2. Change in hairstyle, beard, or facial appearance
- 3. Poor lighting during live capture
- 4. Blurry camera image
- 5. Glasses, shadow, or face obstruction
The mismatch does NOT mean rejection — it only means identity confirmation is required manually.
Connect with SARTHA™
Join Free our Youtube, Telegram & WhatsApp Channel for Exam, Counseling, Cutoff related Updates & Notifications
Step-by-Step Method to Fix Aadhaar Photo Mismatch
Step 1: Note Application Number
When the error appears, carefully note your application number.
Step 2: Print Verification Certificate From Portal
Login again to the NEET UG application portal. There will be an option “Print Verification Certificate”. Download and print this certificate directly from the portal.
Important: Do not download the verification certificate from the information bulletin PDF. The certificate generated from the portal already contains your details.
Step 3: Live Photo Already Embedded
The verification certificate automatically contains the live photo captured during registration. You should NOT edit or replace this photo.
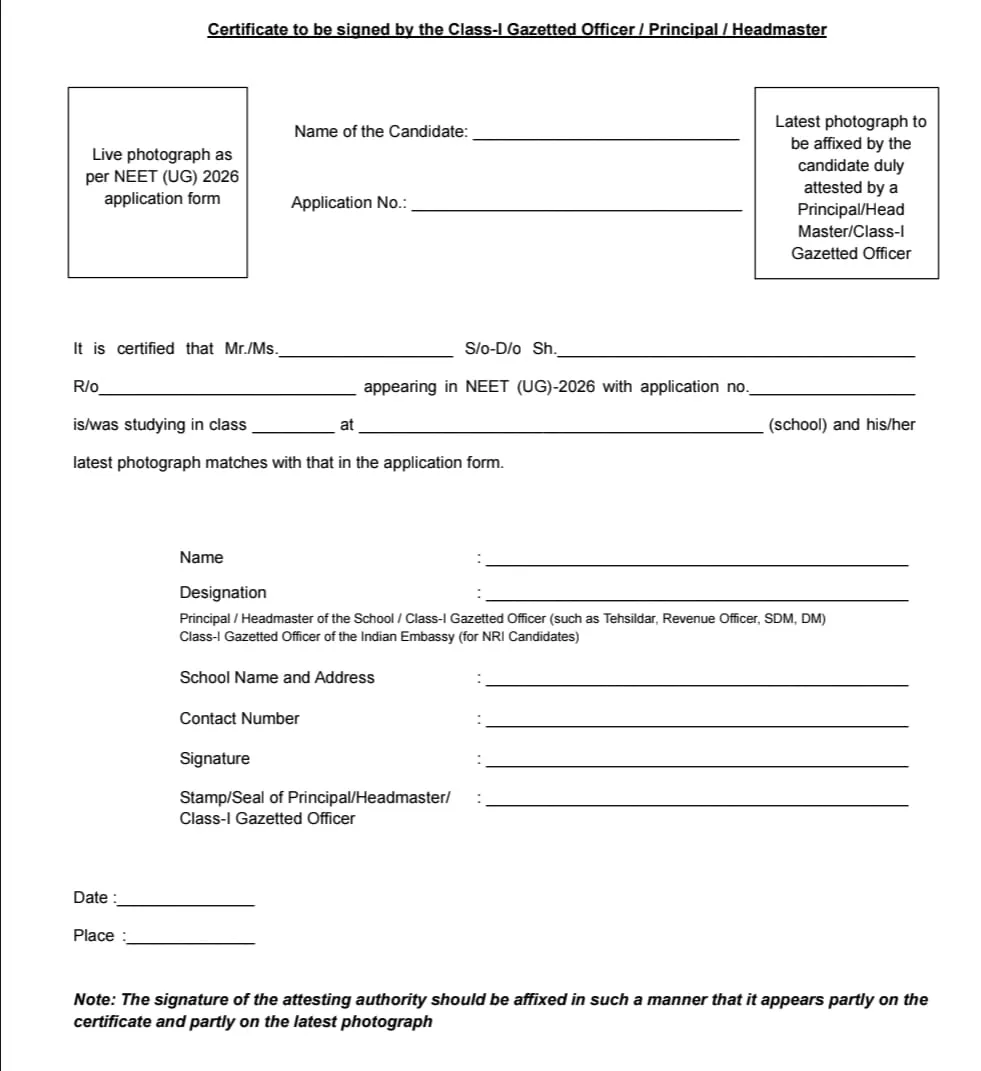 Note: When candidates download from their profile there will be mentioned names and applications number with live photographs.
Step 4: Attach Latest Photograph
Paste a recent passport-size photograph in the designated place on the certificate and fill all required personal details carefully.
The photo used must remain the same throughout:
- 1. Live captured photo
- 2. Attested verification certificate
- 3. Appearance in exam hall
Step 5: Get Attestation
Get the certificate signed and stamped by:
- 1. School/College Principal
- 2. Headmaster
- 3. Class-I Gazetted Officer
Seal, signature, date, and place must be clearly mentioned and signature should overlap the photograph slightly.
Step 6: Upload to Portal
Scan the attested certificate and upload it in the NEET portal. After successful upload, candidates will receive confirmation on:
- 1. Application portal dashboard
- 2. Registered email ID
After Uploading
1. Once NTA verifies the certificate:
- 2. Your application form will reopen
- 3. Fee payment option will activate
- 4. You can complete registration normally
Photo Guidelines
- 1. Recent passport photograph
- 2. Plain white background
- 3. No cap, sunglasses, or mask
- 4. Face clearly visible
- 5. Maintain same look on exam day